Thursday, October 28, 2010

Hellooooo, Dolly! (crispy toffee bars)

We are not what anyone would call an "outdoorsy" family.  But this October has been so much like the blazing autumn of our imaginations, instead of the usual raw and gloomy reality, that even we made time to walk to the park on a recent sunny Sunday.  After an hour or so of romping through two playgrounds, you need the promise of a snack, a little something, to carry you and your wilting offspring all the way back to the house.

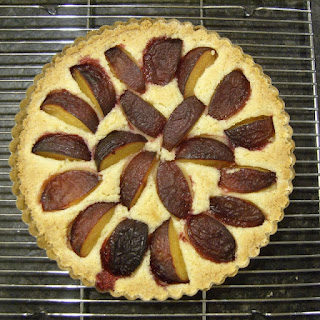
This was the little something waiting for us:


Dolly's Crisp Toffee Bars, from Maida Heatter's Book of Great Chocolate Desserts.  My son, fooled by the resemblance to our regular chocolate chip cookie bars, took a bite and said, "I thought they would be soft!"  It was not a criticism.  This cookie is a crispy, crunchy, buttery surprise.  There's no leavening to make these chewy or cake-like.  Just butter, brown sugar, flour, vanilla and salt.  Oh, and the chocolate and nuts.


These mix up in a moment.  I didn't have the walnuts the recipe called for, and I was even short on almonds.  The kids aren't walnut fans, anyway, though I'm starting to include them in recipes whether they like it or not.  It's my duty to develop their palates, right?


I can imagine these beauties gussied up with a thin layer of chocolate spread on top, perhaps with a dusting of finely chopped nuts.  Maybe I'm just trying to recreate the toffee bars my friend Kathy's mom used to make.  I remember them fondly after nearly 30 years.  (Kathy H., if you're reading this, maybe you can get me the recipe!)  Logistically, a better idea might be to dip the cooled bars in chocolate.  Or slice them smaller, drape them in ganache, and now they're a candy bar with a nutty, buttery cookie center.  Hmmm...some of you may be getting these for Christmas.

A couple of directions are essential to this recipe.  First, fill the sheet pan with small clumps or spoonfuls of dough, and then press it down into the pan.  The dough is quite stiff and won't spread otherwise.  Second, cut the bars in the pan while still hot from the oven. Then let them cool completely in the pan before taking them out.  These bars are so crispy, you'll just shatter them if you try to cut them after they've cooled.


Crisp Toffee Bars
not really adapted from Maida Heatter
 
2 sticks unsalted butter
1/2 tsp. salt
1 tsp. vanilla
1 cup brown sugar, firmly packed
2 cups all-purpose flour
1 cup nuts, chopped into medium-size pieces (I believe any kind would be good in these)
1 cup semisweet chocolate chips

Preheat oven to 350 degrees.  Cream the butter in the mixer; add salt, vanilla and sugar and beat well.  Add flour with mixer on low.  Scrape the bowl with a rubber spatula (Are your spatulas rubber? Mine are all silicone!) and beat until mixture holds together.  Add the nuts and chocolate chips and stir until evenly distributed (I just use the "stir"--very slow--setting on the KitchenAid).

Place small spoonfuls of dough (I used my mini ice cream scoop, but you can also use your fingers) in an ungreased 10"x15" jelly roll pan.  Press the dough firmly with your fingers to make a thin, even layer.

Bake for 25 minutes, until golden brown.  Reverse the pan from front to back halfway through if your oven doesn't bake evenly.

Let cool in the pan for just a minute, then cut into bars with a small, sharp knife.  Leave the bars in the pan and go take a walk in the park.  When you return, serve the cooled bars with hot coffee or cold milk, and start thinking about what to make for dinner.  You've already taken care of dessert.

Monday, October 25, 2010

The quest for the perfect sandwich bread

I'm a bit of a dilettante when it comes to bread.  I dabble.  I read some tips over here, I get some advice over there, and I try random recipes.  I think it has resulted in some pretty good bread.  But my goal has been to find a sandwich bread to replace the 89 cent honey wheat loaf from Aldi that the kids will deign to eat in their lunches. Their requirements:  it shouldn't be brown, no obvious seeds or nuts, not too chewy, not too crumbly and no hard crusts.  Yeah, they want Wonder Bread.  My requirements:  some whole grains, not too much sweetener (lots of HFCS in that Aldi bread...), not too much fat, and not too much work.

The latest contender: Cracked Wheat Bread from the Moosewood cookbook.  Naturally, I only tried this because I already had a big bag of cracked wheat (aka bulgur, though apparently they're not exactly the same thing) in the pantry.  The recipe calls for both whole wheat bread flour and all-purpose flour.  I've been using all Eagle Mills All-Purpose Flour with Ultragrain.  We started buying this flour at Costco, because it was the only unbleached bulk flour available there.  A little research tells me it is a blend of white whole wheat flour and regular refined white flour.  So, it's not 100% whole wheat, but it's a step in the right direction.  And the cracked wheat is a whole grain, so I feel this is a good compromise.

I've made this recipe twice, and learned a few things.  First, a little kneading by hand halfway through really helps the kneading action of the KitchenAid dough hook.  Also, don't forget the salt.  Ahem.  Finally, I'd really like some new loaf pans.  A typical bread recipe yields two large loaves (9"x5"-ish), but my loaves usually end up kind of wide and squat.  The second time I baked this bread, I used one large loaf pan and one small, dividing the dough into 2/3 and 1/3 portions.  Both pans had proportionally more dough, and so rose more out of the pan and had that typical rounded shape I was looking for.  To be honest, these sizes are great for our family.  Two slices from the small loaf makes a perfect sandwich for a kid.

But what's the verdict on taste?  I really like this bread.  The cracked wheat gives it some texture, but the butter adds enough softness to balance it.  I especially like this bread toasted.  It doesn't crumble, and it has a fine, uniform texture, without big air pockets.  And it keeps well in a sealed plastic bag for a few days.  I've been slicing one loaf and freezing the second until we're ready for it.  But best of all, the kids have eaten it without comment or complaint.  A winner!  (I may start sneaking in a greater amount of whole wheat flour and see how far I can go before anyone notices.)

Cracked Wheat Bread
adapted from New Recipes from Moosewood Restaurant

1/2 cup cracked wheat or bulgur (mine was labeled "cracked wheat/burghul, #1 Fine")
1 1/2 cups water
1/4 cup butter
4 tsp salt
1/4 cup honey

1 Tbsp active dry yeast
1/2 cup warm water

1 cup milk
5 1/2 to 6 cups unbleached all-purpose flour with Ultragrain (or a mix of 2 cups white whole wheat flour and 3-4 cups white flour)

Cook the cracked wheat in the water for about 10 minutes, stirring as needed, until the water is absorbed and the wheat looks like hot breakfast cereal.  Add butter, salt and honey.  Meanwhile, proof the yeast in the warm water.  In a large bowl, mix the cracked wheat mixture and milk.  When the mixture has cooled to lukewarm, pour in the yeast and stir.  Mix in the flour until the dough is stiff enough to knead.  Knead it a minute or so by hand, and then transfer to the stand mixer with dough hook and knead for about 8 minutes on medium-low speed.  (Or knead it all by hand for 10-15 minutes.)  The dough should remain soft and a little sticky.  Place the dough in a greased bowl, turning to coat the dough.  Cover and let rise until doubled, about 90 minutes.

With floured hands, punch down the dough and knead it for one minute in the bowl.  Shape into two loaves and place in greased loaf pans.  Cover and let rise until doubled, about 30 minutes.  Bake in a preheated oven at 375 degrees for 30-35 minutes (mine was closer to 40 minutes for the extra large loaf).  Cool completely on a rack before slicing.


'Tis the season :)

Wednesday, October 20, 2010

Good cakes make good neighbors

I cannot take the least bit of credit for this recipe, but it's so good I feel compelled to share it.  It's a rhubarb-apple coffee cake that is perfectly balanced--not too gooey or too dry, not too sweet or too spicy.  A cake that would be wonderful for a special occasion, or no occasion at all.  Go get the recipe at Whipped, a great local (Chicago!) food blog, and then share some cake with your neighbor.  In fact, invite them over, because your house now smells so good, nobody will notice the unfolded laundry or the dishes in the sink.


(By the by, the cake I made has mostly apples, and very little rhubarb, since it isn't really rhubarb season in October.  I feel confident that this cake would happily accept all rhubarb or all apple--whatever you have on hand.  Oh, and I promise to lay off the apple recipes for a while!)
Mixing up the batter


Crunchy crumble topping


Almost ready for the oven...


Sit down with some coffee and put your feet up!

Monday, October 18, 2010

Cheese and almond stuffed zucchini

Lest you think we only eat bread or cake around here, I wanted to share an actual dinner, with vegetables, even!  In fact, it's from a venerable vegetarian cookbook, New Recipes from Moosewood Restaurant.  The edition in our kitchen isn't looking so new, my husband having brought it to the marriage 10 years ago, and who knows how long he had it before that.  It could use a little tape around the binding these days, which just goes to show how much we use it.  Some recipes are classics, and we wouldn't think of using any other version:  Hummus with Tahini, Country-style Moussaka, Spicy Szechuan Noodles, Mississippi Mud Cake, Tart Lemon Tart...and these delicious zucchini boats.  Granted, they are not yet a hit with the small people (though one said the filling was good), but I am happy to eat the leftovers for lunch.

3 medium zucchinis
2 Tbsp. olive oil or butter
1 cup finely chopped onion
1 tsp. salt
6 oz. cream cheese (I used low-fat)
1 1/2 cups finely chopped almonds
1/2 cup bread crumbs
2 cups grated cheese (the original calls for Swiss; I used sharp cheddar)
1/2 tsp. nutmeg, or 1/4 tsp. mace
1/4 tsp. allspice


Cut the zucchini in half lengthwise and scoop out the insides with a spoon.  Save the pulp and chop it.  Saute the onions in the oil until soft; add the salt and zucchini pulp and continue to cook until zucchini is soft.  Remove from heat and stir in the cream cheese until it melts.

Meanwhile, mix together the almonds, bread crumbs, grated cheese and spices.  When the cream cheese has melted, combine all ingredients in a bowl.

Fill the zucchini shells and place them in a greased 9"x13" baking dish.  Add a little water to the bottom of the pan (about 1/4" deep).  Tightly cover the pan with foil and bake covered at 350 for 30 minutes.  Uncover and bake for another 10 minutes or so, until the filling has browned a little.

This is the perfect make-ahead recipe; it reheats beautifully.  I haven't tried freezing it, but I think it would do well.  I am trying to think of other vegetables that could get this kind of cheese filling...obviously yellow squash, but what else?  Leave a comment with your ideas!

Perfect leftovers for lunch


Friday, October 15, 2010

Caramel apple muffins

After I made those apple cider doughnuts, I stumbled on a recipe for caramel apple doughnuts.  They were baked in those special doughnut pans, and then dipped in caramel.  Sounds good, right?  But a couple things bothered me:  the need for special baking pans, and the caramel sauce made from melted caramel candies.  I was sure I could do better.

First, I made homemade caramel sauce.  It's easy and takes about 10 minutes.  Then I baked the doughnuts in muffin pans (the recipe even said it was adapted from a muffin recipe).  I drizzled the sauce over the warm muffins, and this is what I got:


That doesn't looks so bad.  They didn't taste bad, either, but they weren't what I had in mind.  The batter was too wet--it had too much butter and sugar (too much?!?)--and I used Granny Smith apples, whose tartness I hoped would give a nice contrast to the sweet caramel.  Instead, they were a little too tart, and the muffins were more like a gooey carrot cake.  I had been looking for something with a little more heft.  Something I wouldn't mind eating for breakfast or dessert.

So I tried again.  This time I began with a tried and true muffin recipe, and adapted from there.  And I found what I was looking for.

Oops! I left the honey out of the picture.
2 cups all-purpose flour
1/2 cup light brown sugar
1/2 tsp. salt
1 Tbsp. baking powder
1/4 tsp. baking soda
1/2 tsp. cinnamon
1/4 cup softened butter
1/2 cup buttermilk
2 eggs
1/4 cup honey
1 tsp. vanilla
1 cup grated apple (a sweeter variety--I used Honey Crisp and Fuji)


Preheat the oven to 500 degrees F.  Whisk together the dry ingredients, and then rub in the softened butter with your fingers until it is completely incorporated.  Whisk all the wet ingredients together (I like to do it right in my 2-cup measuring cup), stir in the grated apple, and pour the wet mixture into the dry.  Stir just until the batter comes together, no more than 20 seconds.
Wet ingredients into dry

Fill greased muffin tins 3/4 full of batter (this makes 12 standard size muffins) and pop them in the oven.  Immediately turn the temperature down to 450 degrees F.  Bake for 12-15 minutes, or until a toothpick or skewer comes out clean.


Golden brown muffin perfection
Look at the rounded tops!
Now, you can stop right there.  These are excellent muffins, and you can have them on the breakfast table in 30 minutes flat.  Even less, if you substitute apple sauce for the grated apple.  Wouldn't they be good spread with a little apple butter?  But remember, I had some of this:


Drizzle the caramel sauce over the warm muffins, and try not to eat them all before your family and friends get home.
 
 
Well, maybe just one or two.

Tuesday, October 12, 2010

Traditional Columbus Day desserts


Huh?

Plum tart
Okay, so the only thing traditional about Columbus Day is that the kids have a Monday off from school and they are hanging around waiting to be fed.  And it's a long weekend in October, so it's a good time to visit the grandparents in the country and pick some apples.  More people at the table, more dessert!

Before we got around to apple picking, I saw these nice plums, and this tart recipe from Orangette looked so easy that I had to try it.  You should, too.  I would like to experiment with different fruits--peach, apricot...what about grapes?  The beauty of this recipe is that there's no fussing with pastry dough, no rolling, chilling or crimping.  Just dump the mixture into the tart pan, press it gently, arrange the fruit and bake.  It was good with vanilla ice cream for dessert, but I would eat it any time of day.  It would be an easy addition to a brunch buffet.

Simplest Apple Tart
After the apple picking, we had bags of Granny Smith and Fuji.  So, as I continue to cook my way through the Smitten Kitchen archives, I made this Simplest Apple Tart.  (I'm drawn to any recipe with the word "simple" in it.  It's not that I fear the complex, it's just that I'm impatient.)  I was a little hasty and failed to chill the dough quite enough before assembly, but this was another winner.  If you're still a pastry-phobe, try this first, and just bake it on a sheet pan with parchment.  Nothing but butter, sugar and apples here.  And if you want to skip a step, skip the part about making syrup with the apple peels.  Don't get me wrong, it was delicious, and not difficult, but it is One More Thing To Do, and this recipe was supposed to be simple, right?  You may find me just brushing the tart with a little honey next time.


Back at the orchard, we could have picked up some apple cider doughnuts to go with our fresh apple cider.  But I've been waiting to make these, so that's what we did on Monday.  (That's about all we accomplished.)  And now that I've made them, it's going to be hard to stop making doughnuts.  I compared a several recipes, which were all similar, so I stuck to this one.  It's a cake doughnut, with buttermilk, butter, and reduced apple cider.  I used whole grain flour, so I needed a little more liquid in the batter.  One grated apple did the trick.  These were not difficult, and my five-year-old helped when it was time to cut them out.  The recipe makes so many (I used a smaller cookie cutter, too) that I only fried up half the batch.  I froze the others (all cut out and ready to go) on a cookie sheet, and then transferred them to a freezer bag when they were solid.  Next time we want doughnuts, I'll thaw them for as long as it takes to heat the oil, and it will be faster than a run to Dunkin' Donuts.


Friday, October 8, 2010

Cheddar scones

Tonight's dinner plan is cream of broccoli soup (actually requested by one seven-year-old as Something He's Willing to Try).  But hey, I wasn't born yesterday.  The odds of everyone eating their fill of just soup are not good.  A certain two-year-old likes soup--but only for splashing.  So I need a little something to round out the meal. 

Enter the scone.


Here's the recipe for this savory version:  2 cups all-purpose flour, 1 cup whole wheat flour, 1 T. baking powder, 1/2 tsp. baking soda, 1 tsp. salt, 6 T. room temperature butter, 1 cup shredded cheddar, 1 egg, 1 cup buttermilk.

Preheat the oven to 500 degrees.  Whisk the dry ingredients together.  Cut the butter into the flour mixture with a pastry blender, or just use your fingers to rub it in until the mixture looks like bread crumbs.  Stir in the cheddar.

Cutting in the butter
Looks like bread crumbs!
Beat the egg and buttermilk together and pour into the flour mixture.  Stir together until it just starts to stick together.  Then use your hands to squish and gently knead the dough into a ball.

Getting sticky...
All together now!
Divide the dough in half, press each half into a disc about 1/2" thick, and cut into wedges.  Transfer the scones to a baking sheet, turn the oven down to 450 degrees F., and bake for 10-12 minutes, or until golden brown.

Since I made these early in the afternoon, I underbaked them by a couple minutes so I can reheat them in the oven this evening.  You can adjust this recipe very slightly for sweet scones:  reduce the salt to 1/2 tsp., add 2-4 T. sugar, and omit the cheddar or replace it with something else (raisins, chocolate chips, dried fruit of any kind, cinnamon chips...)

Try it!
Posted by Picasa

Thursday, October 7, 2010

Pie crust, part two: mushroom pasties

Remember that extra pie dough waiting in my fridge?  I used it to make these little mushroom pasties, turnovers, empanadas--whatever you call 'ems.  I thought I was going to make mini quiches, but then I looked at my mini muffin tins.  Sometime last year we used them to make swirly rainbow crayons with all our broken crayons, and I haven't been able to get all the wax off the muffin tins since then.  Not a problem if you're using cupcake liners, but otherwise...

I finally remembered an old cookbook about appetizers sitting on our kitchen shelf. I found and adapted this little recipe for the mushroom filling.  Saute chopped scallions and mushrooms in a little butter until the liquid has evaporated.  Stir in a pinch of mustard, a tablespoon of flour, then a splash of wine and a splash of cream.  Cook a minute or so, until thickened.  Next time I will add some chopped garlic and thyme. But you could fill these with anything, savory or sweet.  What about a cube of sharp cheddar and a little bit of shaved ham?

The first step was to take the dough out of the fridge and let it warm up enough to roll.  I cooked up the mushroom filling, transferred it to a bowl, and put the bowl into the freezer to cool the filling.  Then I rolled out the dough.

A few tricks for the dough.  It's better if it's cold (but not so hard that it won't roll, obviously).  Try not to over work the dough.  And don't go crazy with the flour.  I turn the dough after every few passes with the rolling pin, and if anything is sticking, I dust that area with a little flour.  I usually roll out my dough between sheets of wax paper, but as you can see, I ran out and had to make do without.  I also love the maple rolling pin my husband gave me several years ago.  Any praise I might give it comes out sounding like a racy metaphor, so let's just say it's beyond compare and leave it at that.

I cut the circles out with a small wine glass, and got about 24 after rolling out the scraps of dough. Put about 1 teaspoon of filling on each circle and pinch it closed.  At this point, you can seal the edges by pressing with a fork, but I crimped them like empanadas, just to see if I remembered how.  (This is not a skill I can explain.  My dad taught me sometime in the distant past, and apparently, it's like riding a bike--you never forget.  But I'm thinking of making some larger empanadas, maybe filled with ham and cheese, to put in the kids' lunches.  Maybe I can get an assistant to video the process.)

Brush with an egg wash (that's just a beaten egg, nothing fancy) and bake at 400 degrees for 10-15 minutes.  When they were cool, I did cover and refrigerate them until my evening meeting.  About 15 minutes before I left home, I warmed them up in a 350 degree oven, foil-covered platter and all.  There weren't any leftovers to bring home from club!  Which is more--or less--than I can say for the healthy spinach dip and veggie platter that I also contributed, thinking a mere 24 appetizers might be insufficient.  I guess nobody really wants celery sticks with wine and Bunco.


Posted by Picasa